How to Replace The Sky In Your Photos
In the realm of photo editing, sky replacement stands out as an effective way to enhance the mood and aesthetic of an image. By changing the sky in a photograph, we can transform an ordinary photo into a spectacular one, even if the original conditions were less than ideal. This technique allows us to add vibrant sunsets, serene blue skies, or even night skies filled with stars, tailoring the image to convey the precise atmosphere we desire.
 Before image - Sky Replacement
Acquiring proficiency in sky replacement requires understanding the tools and methods that make seamless integration possible. Fortunately, advancements in photo editing software have simplified the process, some even offering automated functions to expedite the task. We explore how to prepare our photo for the change, choose the correct replacement sky, blend it flawlessly, and apply any advanced techniques to achieve realistic results. The final touches, such as exporting and saving the work properly, ensure that our efforts in sky replacement add value to our photography portfolio or personal collection.
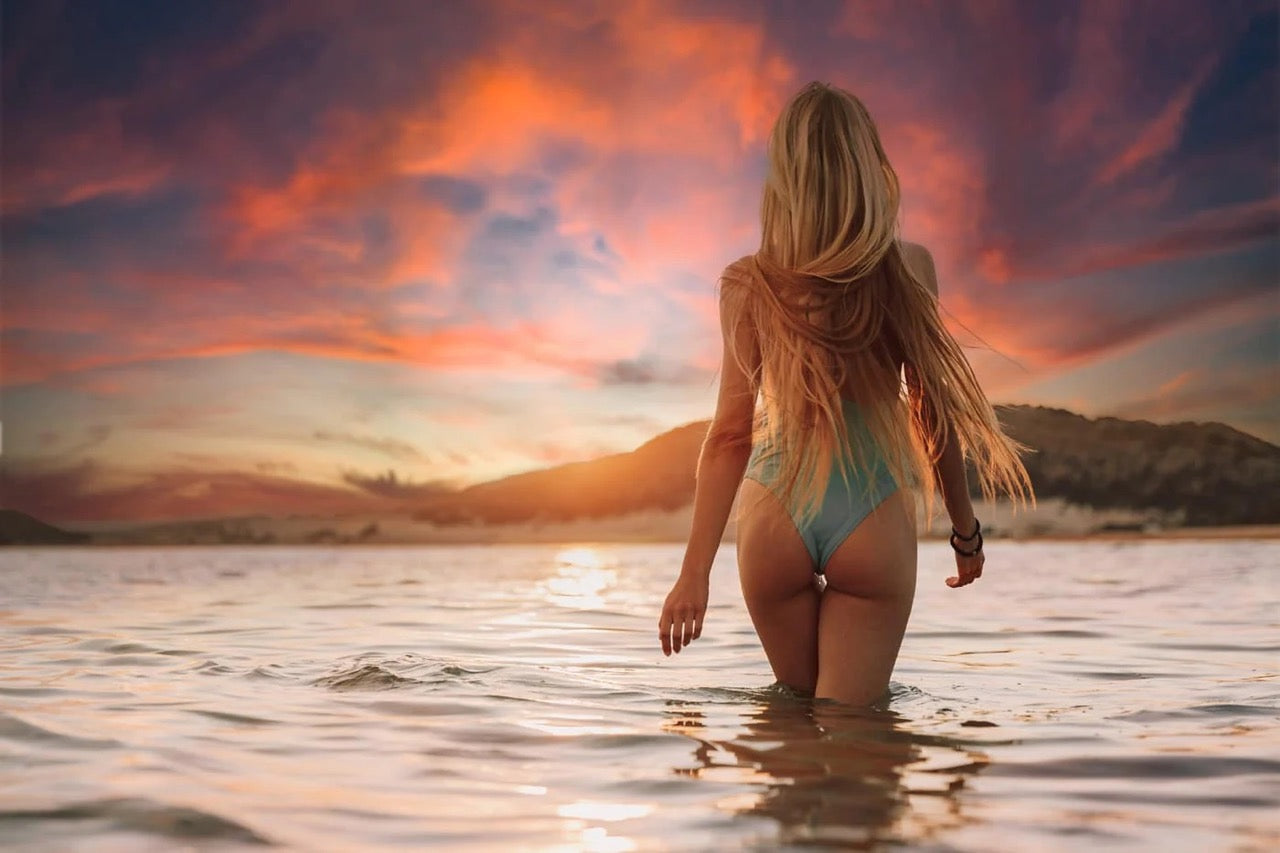
 After Image - Sky Replacement - Get These RAW FILES HERE
Key Takeaways
- Sky replacement enhances the visual impact of photos by altering the mood.
- Photo editing software has made sky replacement more accessible and efficient.
- Proper execution includes preparing, blending, and saving the edited image.
Understanding Sky Replacement
Sky replacement is a post-processing technique that allows us to change or enhance the sky in our photographs. It is not just about replacing a bland sky — it can fundamentally alter the mood and realism of the image.
The Basics of Sky Replacement
When we talk about the basics of sky replacement, we refer to the process of selecting and seamlessly integrating a new sky into an existing photograph. To do this effectively, we must pay close attention to the edges where the sky meets the other elements in the picture, ensuring that the blending is natural. It’s also crucial to match the lighting and colors between the sky and the foreground to maintain the realism of the image.
Types of Skies for Replacement
The types of skies we can choose for replacement vary widely and can be categorized based on the mood they convey:
- Clear Skies: Invoke a sense of calmness and are ideal for bright, sunny scenes.
- Dramatic Clouds: Add tension or a foreboding mood, suitable for more dynamic compositions.
- Sunsets/Sunrises: Offer warm, vibrant colors that can give images a romantic or nostalgic feel.
- Stormy Skies: Can transform an image to appear more intense or moody.
Selecting the proper sky is crucial, as it needs to complement the rest of the image for the scene to appear cohesive and realistic.
Essential Tools for Sky Replacement
When we undertake the task of sky replacement, we equip ourselves with a suite of powerful tools designed to seamlessly blend new skies into our photos. The effectiveness of these tools can transform a dull sky into a vibrant canvas that enhances the overall impact of the image.
Selection Tools
Photoshop offers advanced selection tools that prove indispensable for sky replacement. The Lasso tool is perfect for rough outlines, while the magnetic version snaps to edges, refining our selection. Here's how we can maximize their utility:
- Magnetic Lasso Tool: Automatically clings to the edge between sky and landscape.
- Polygonal Lasso Tool: Ideal for angular selections, making it a good companion for architectural shots.
For a professional touch, we apply a feather to the selection. This softens the edges, allowing the new sky to blend seamlessly with the existing image.
Adjustment Sliders and Tools
After we insert a new sky, refinement is key. We turn to adjustment sliders and tools to fine-tune the replacement sky. Our toolkit includes:
- Temperature Slider: Adjusts the warmth or coolness to match the sky with the rest of the photo.
- Curves: Helps us control the luminance for a balanced exposure.
- Saturation: Enhances or mutes the colors for a natural or dramatic effect.
To ensure cohesion between the new sky and the landscape, we use contrast adjustments to match the lighting conditions. The end result is a sky that looks like it was always part of the original scene.
Leveraging both selection precision and nuanced adjustments gives us the confidence that our sky replacements will look authentic and elevate the visual appeal of our photos.
Preparing Your Photo
Before we begin replacing the sky in our photos, it's crucial to properly prepare the image. This involves importing the images into our photo editing software and selecting the specific area of the sky we aim to replace. We must ensure our foreground remains untouched during this process. Let's go through these steps methodically.
Importing Images
Firstly, we need to import our photo into the editing software. In programs like Adobe Photoshop, you can easily import by selecting File > Open or by dragging and dropping the image directly into the workspace. Once opened, we'll make it a habit to zoom in slightly, to get a clearer view of the sky area which will help in accurate selection later on.
Selecting the Sky Area
With our image ready, the next step is to select the sky. We must be precise in our selection to ensure the replacement looks natural. Most editing software provides multiple tools for this, but the 'Lasso Tool' is often the go-to. Here's how we use it:
- Select the 'Lasso Tool' from the tool palette.
- Carefully draw around the area of the sky. If the software includes a 'Sky Selection' feature as in some versions of Adobe Photoshop, we can use that to automate the selection process.
- Once selected, it's essential to refine the edges to prevent the foreground from being affected. This may involve adjusting the feathering to create a smooth transition between the sky and the foreground.
By meticulously following these steps, we prepare our photo for a seamless sky replacement that integrates perfectly with the existing elements of the image.
Executing the Replacement
When we set out to replace the sky in our photos, it's essential to select an appropriate new sky, finesse the edges for a seamless blend, and adjust the foreground to ensure the lighting and colors harmoniously match the newly inserted sky.
Applying New Sky

To start, we need to open our image in Adobe Photoshop and navigate to Edit > Sky Replacement. Here, Photoshop's AI tool presents us with a variety of preset skies. We choose one that best fits our scene or upload a custom sky image. Once chosen, the new sky is placed into our composition, and we're able to use the Move tool to situate it precisely.
Refining the Edges
Next, we focus on the transition between the original image and the new sky. We must make sure the edges around the subjects in the foreground are refined. This can be done using the Edge Lighting slider, which adjusts how the light of the new sky affects the edges of the foreground objects. At times, converting the sky layer to a Smart Object may offer us more flexibility for non-destructive edits.
Adjusting Foreground to Match Sky
Our final step is to address how the inserted sky affects the foreground. Using the luminosity and color adjustment settings, we tweak the brightness and color temperature to make sure the lighting in the foreground meshes well with the new backdrop. This might involve enhancing warmth or coolness to reflect the sky's ambiance, ensuring a convincing and aesthetically pleasing result.
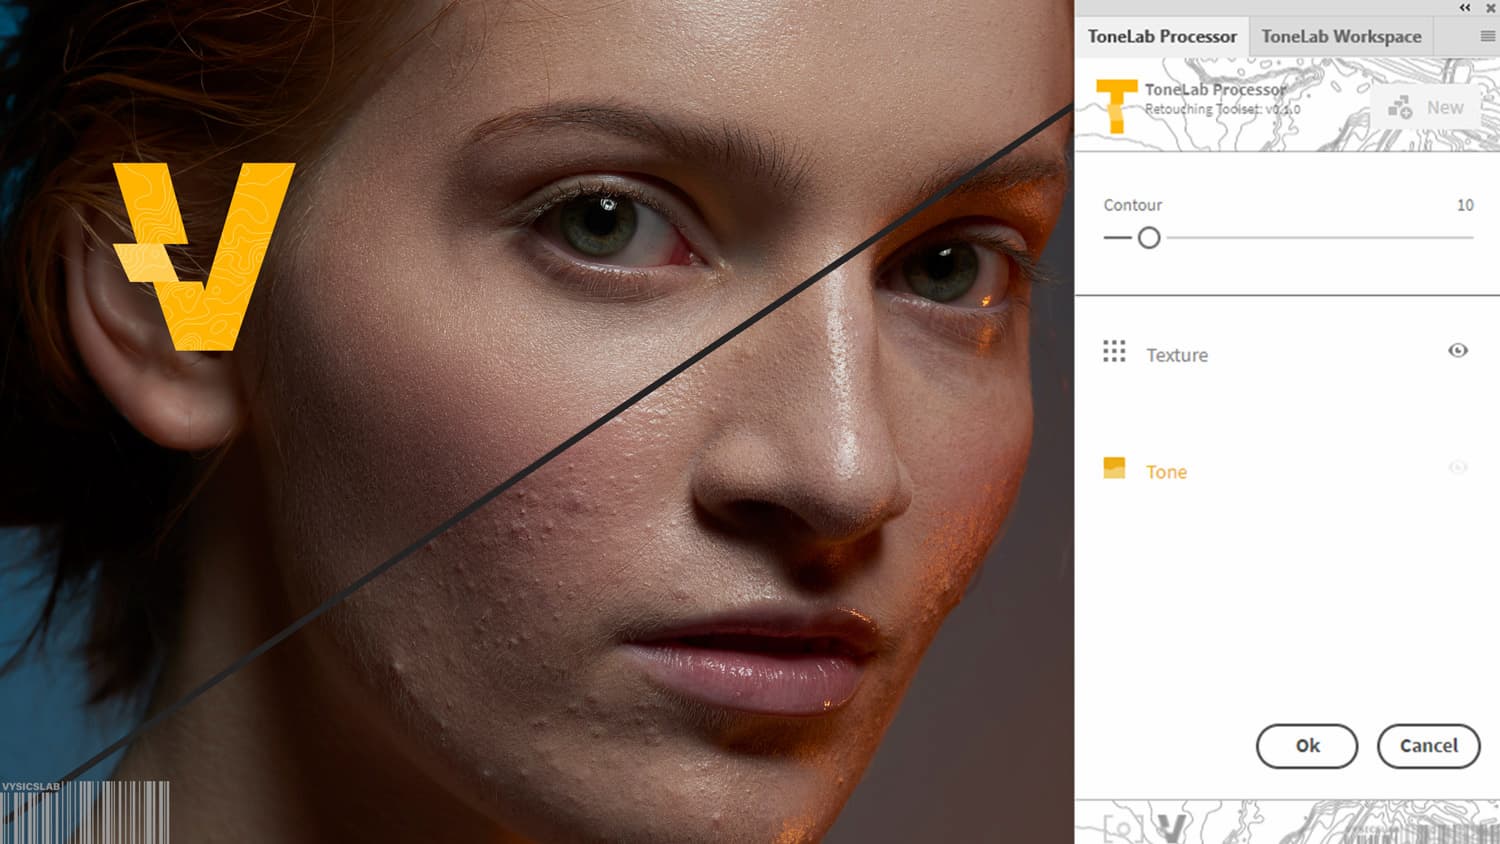
Advanced Editing Techniques
In our quest for impeccable imagery, we often encounter scenarios where the sky in our photos doesn't match our creative vision. With advanced editing techniques, we can transcend these limitations. Here, we'll focus on two cutting-edge methods that have revolutionized our approach to editing skies: AI-driven tools and compositing methods that enhance realism.
Using AI Sky Replacement Tools
Artificial intelligence has simplified the task of sky replacement, allowing us to edit skies efficiently with remarkable results. When we select an AI tool for sky replacement, we're leveraging sophisticated algorithms that can detect the sky in our photo with incredible precision. These tools, such as the AI features found in Adobe Photoshop CC, possess the capability to isolate the sky from the rest of the image and blend a new sky seamlessly with the existing landscape. This not only saves time but also maintains the natural look of the photograph.
Compositing for Realism
Compositing is an art form that requires us to merge different elements from various images to create a single, cohesive scene. To master this technique, we must pay attention to detail, ensuring that the lighting and perspective of the new sky match the original photo. It's an intricate process where we might need to adjust the color, saturation, and exposure to ensure a believable outcome. Good compositing also means we're sometimes painting in reflections and subtle shadows to blend the new sky in a realistic manner. This is essential for achieving a photo that doesn't look like it was tampered with but rather appears to have been captured at the perfect moment.
Exporting and Saving Your Work

When we finish editing our skies in Photoshop, it's crucial to export and save our work properly to ensure the highest quality of our final image. Here's how we handle the exporting process, select the best file formats, and follow saving best practices.
Export Options
In Photoshop, we have several options when exporting our finished photos:
- Quick Export: Ideal for fast sharing, where image size and quality are secondary.
- Export As: Gives more control over format, size, and resolution.
- Save As: Traditional method providing comprehensive file format options.
Lightroom also offers streamlined export services, optimized for large numbers of images or when working with raw files.
File Formats
We use various file formats based on our need for quality, editability, and compression:
- JPEG: Best for web use due to its balance of quality and file size.
- PNG: Good for images with transparency or when quality outweighs file size concerns.
- TIFF: Ideal for retaining quality with lossless compression, perfect for printing or archiving.
- PSD: Photoshop's format retains layers and edits, best for ongoing editing.
Saving Best Practices
To maintain the integrity of our edits, we follow these best practices:
- Regularly Save our work to avoid data loss.
- Use Save As to create milestones in editing, ensuring we have backup versions.
- Before saving, always double-check our image quality settings to match our intended use for the image.
- Consider non-destructive editing techniques to preserve original image data.
By adhering to these methods, we secure our Photoshop projects, making our workflow efficient and reliable.
Sky Replacement in Video Editing
When it comes to video production, the ability to replace skies can transform any scene dramatically. Not only does this technique enhance the visual appeal, but it also gives us control over the temperature and mood of the footage.
Sky Replacement for Videos
In the realm of video editing, Adobe Photoshop may come to mind primarily for photo manipulation, yet it is a powerful tool for replacing skies in videos as well. Although Photoshop is predominantly used for image editing, it offers capabilities to handle video files, assuming one has the expertise to navigate its more complex interface.
Within Adobe Photoshop, we can take advantage of its frame-by-frame editing feature to apply a new sky. It requires some patience, but it proves beneficial for videos that have a static camera angle. The process typically involves setting the new sky as a background layer and meticulously masking the original sky out of each frame.
Alternatively, specialized video editing software such as CyberLink PowerDirector streamlines the sky replacement process. It offers AI assistance that detects and replaces the sky throughout video clips. This reduces the time-intensive nature of manual frame-by-frame editing.
Here's a quick breakdown of our sky replacement process for videos:
- Import Video Footage: Begin by uploading the video into the editing software.
- Detect and Mask Sky: Utilize software with AI capabilities to efficiently detect the sky throughout the video clips.
- Choose Replacement Sky: Select from a variety of sky templates or upload a custom sky that compliments the desired mood and temperature of the scene.
- Adjust Sky Settings: Fine-tune the sky's appearance, including its temperature, to ensure a natural integration with the existing footage.
- Apply and Render: Once satisfied, apply the changes and render the video to view the enhanced result.
By carefully selecting our replacement sky and ensuring a seamless blend with the original footage, we can craft video scenes that convey the exact tone and feeling intended. Using the right tools, like CyberLink PowerDirector, makes this process far more accessible, allowing us to focus on the creative aspects of sky replacement without getting bogged down by technical difficulties.
Practice and Resources
When we embark on enhancing our photographs with sky replacement, practice is key to achieving realism. Here are some resources we can tap into to refine our skills:
-
Begin with Tutorials: Online tutorials offer a step-by-step guide on how to replace the sky in your photos. From selecting the right image to adding the final touches, these tutorials can provide us with a solid foundation.
-
Experiment with Presets: Many photo editing tools come with built-in sky presets. We can start with these before experimenting with custom skies to understand how different skies affect the mood and lighting of our photos.
-
Utilize AI Tools: Modern editing platforms feature AI sky replacement tools that can automate the process. This technology saves us time and often provides a more seamless result.
Here's a concise table of resources to get us started:
| Resource | Feature | Link |
|---|---|---|
| Pixlr | Step-by-step sky replacement process | Replace Sky with Pixlr |
| BeFunky | AI-powered sky replacement | BeFunky Sky Replacer |
| Adobe Photoshop | Comprehensive sky replacement options | Adobe's Sky Replacement Guide |
| Finding the Universe | Manual sky replacement techniques | Manual Sky Replacement |
| Picsart | Easy online sky change feature | Change Sky Online with Picsart |
We should also regularly seek out new images to practice on, setting ourselves the challenge of matching sky to scene, considering factors like light direction and cloud formation. As we grow more comfortable with these tools and techniques, our skill in creating believable, stunning skies will undoubtedly improve.
Frequently Asked Questions
When it comes to enhancing our photos, replacing the sky can dramatically change the atmosphere of our images. Let's explore some common questions about sky replacement and the tools available for this purpose.
How do I use a photo effects editor to replace the sky in images?
We typically start by selecting the sky area in the photo using a selection tool, and then we choose a replacement sky from the available presets or upload our own. Tools like Adobe Photoshop's Sky Replacement feature make this process straightforward, offering a variety of skies to choose from.
What are the best free online tools to change the sky in photos?
There are a number of free online tools we can employ to replace skies in our photos. Websites provide various presets and the ability to upload custom skies, offering a user-friendly interface for quick edits.
Can I change the sky in my photos without downloading any software?
Yes, we can change the sky in our photos using online tools that work directly in a web browser. This means we don't have to download or install any software to achieve professional-looking sky replacement.
Which apps are available for replacing the sky in pictures?
Several mobile and desktop applications are available. For instance, Adobe Photoshop is a popular choice and some newer apps like Luminar Neo also offer advanced AI-powered sky replacement tools.
What techniques can improve the sky in my photographs?
To improve the sky in our photographs, we can adjust the lighting, color balance, and horizon blending to ensure the new sky matches the rest of the image. Employing feathering and edge refinement helps the new sky integrate seamlessly.
Is there a video editing app that allows for sky replacement?
Yes, some video editing apps also include sky replacement features, enabling us to apply dynamic and realistic sky changes to our video footage just as we would with still images.


