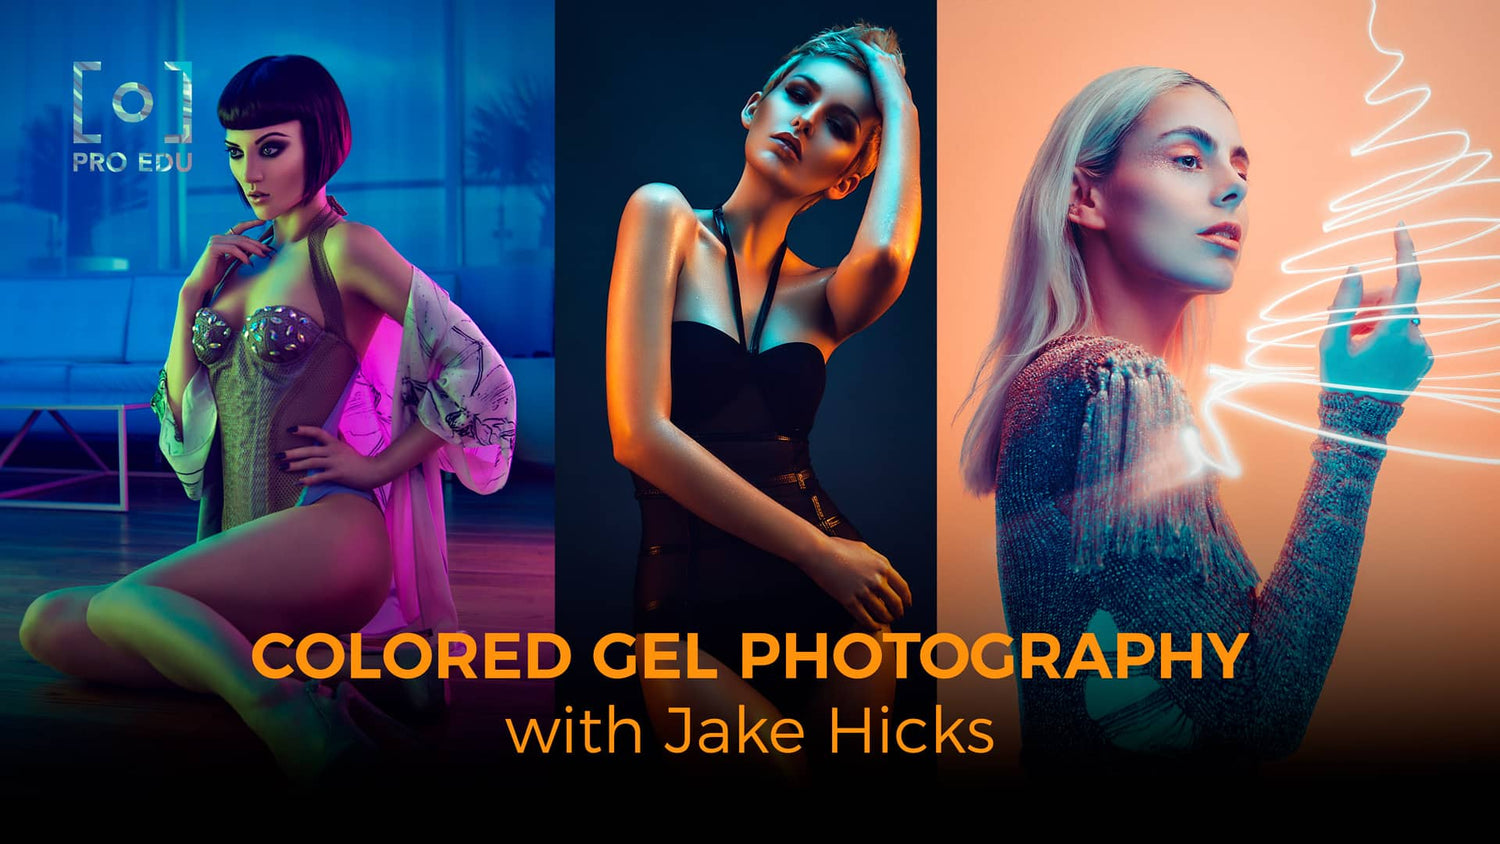
The Basics of Colored Gel Photography with Jake Hicks: A Comprehensive Guide
If you're looking to add some creative flair to your portrait photography, colored gel photography is a great way to do it. Colored gel photography is a technique that involves placing colored gels in front of your lights to create a unique and vibrant look. In this article, we'll cover the basics of colored gel photography with Jake Hicks, a world-renowned photographer who specializes in gelled portraiture.
Understanding colored gel photography is the first step to mastering this technique. We'll cover the essential equipment you'll need for gel photography, including gels, lights, and modifiers. We'll also go over camera settings and exposure, lighting setups and techniques, and how to create the gelled look in photography. Finally, we'll discuss post-production and retouching and building a portfolio with gelled photography.
Key Takeaways
- Colored gel photography is a technique that involves placing colored gels in front of your lights to create a unique and vibrant look.
- Understanding the essential equipment, camera settings, and lighting setups is crucial to mastering this technique.
- Post-production and retouching are also important steps in creating a polished gelled portrait, and building a portfolio with gelled photography can help you showcase your skills and attract new clients.
Understanding Colored Gel Photography
Colored gel photography is a technique that involves using colored gels as filters to modify the color of light. This technique can be used to create a wide range of effects, from subtle color corrections to bold and dramatic color shifts. In this section, we will explore the fundamentals of colored gel photography, including color theory and the historical context of gelled photography and Jake's demonstration of white light.
Color Theory Fundamentals
To understand colored gel photography, it is important to have a basic understanding of color theory. Colors can be broken down into three primary colors: red, blue, and green. These primary colors can be combined to create secondary colors, such as yellow, magenta, and cyan. When using colored gels in photography, it is important to consider how the color of the gel will interact with the color of the light source and the subject being photographed.
Historical Context of Gelled Photography
Gelled photography has been used for decades to create unique and creative effects. In the past, photographers used colored gels to create a range of effects, from correcting color temperature to creating dramatic and colorful lighting effects. Today, colored gel photography is still widely used in the photography industry, and is particularly popular in portrait and fashion photography.
In conclusion, colored gel photography is a powerful and versatile technique that can be used to create a wide range of effects. By understanding the fundamentals of color theory and the historical context of gelled photography, photographers can use colored gels to create stunning and creative images.
Essential Equipment for Gel Photography
As with any photography genre, colored gel photography requires specific equipment to achieve the desired results. In this section, we will discuss the essential equipment for gel photography, including choosing the right gels and selecting lighting equipment.
Choosing the Right Gels
When it comes to selecting gels for your colored gel photography, there are a few factors to consider. Firstly, you want to choose gels that are compatible with your lighting equipment. Some gels may not work well with certain types of lights, so it's essential to check the manufacturer's recommendations before making a purchase.
Secondly, you want to consider the color temperature of your lights. Gels come in a variety of colors and densities, so it's important to choose the right ones to achievethe desired effect. For example, if you want to warm up your subject's skin tones, you may want to use an orange or red gel. On the other hand, if you want to create a cool, moody atmosphere, you may want to use a blue or green gel.
Selecting Lighting Equipment
In addition to choosing the right gels, selecting the right lighting equipment is crucial for colored gel photography. Depending on the effect you want to achieve, you may need to use different types of lights, such as umbrellas, beauty dishes, strobes, or speedlights.
Umbrellas are a popular choice for gel photography because they create a soft, diffused light that works well with gels. Beauty dishes, on the other hand, create a more focused, directional light that can be used to create dramatic shadows and highlights.
Strobes and speedlights are also commonly used in gel photography because they allow you to freeze motion and capture crisp, detailed images. However, they can be more expensive than other types of lighting equipment, so it's important to consider your budget when selecting your gear.
Overall, selecting the right gels and lighting equipment is crucial for achieving great results in colored gel photography. By taking the time to choose the right gear and experiment with different lighting setups, you can create stunning,vibrant images that stand out from the crowd.
Camera Settings and Exposure
Mastering Manual Mode
When working with colored gels, it's important to have full control over your camera settings. This means mastering manual mode. Shooting in manual mode allows us to have complete control over the exposure, which is crucial when working with colored gels. We recommend setting the camera to manual mode, and adjusting the shutter speed, aperture, and ISO to achieve the desired exposure.
Balancing Ambient and Gel Lighting
When using colored gels, it's important to balance the ambient and gel lighting. This means ensuring that the ambient lights in the scene is balanced with the light from the colored gels. One way to achieve this is by adjusting the shutter speed, aperture, and ISO to achieve the correct exposure for the ambient light, and then adjusting the power of the lights with the gels to match the exposure.
Another way to balance the ambient and gel lighting is by using a color temperature meter. This will allow you to measure the color temperature of the ambient light, and then adjust the color temperature of the gels to match. This will ensure that the colors in the scene appear natural and balanced.
Raw Files
When shooting with colored gels, it's important to shoot in RAW format. This will allow you to capture all of the data from the scene, including the colors from the gels. Shooting in RAW also allows you to adjust the white balance in post-processing, which can be useful when working with colored gels.
In summary, mastering manual mode, balancing ambient and gel lighting, and shooting in RAW format are all important considerations when working with colored gels. By following these tips, you'll be able to achieve the desired exposure and color balance in your images.
Lighting Setups and Techniques
When it comes to colored gel photography, lighting is one of the most important aspects to consider. In this section, we will discuss lighting setups and techniques that can help you achieve stunning results.
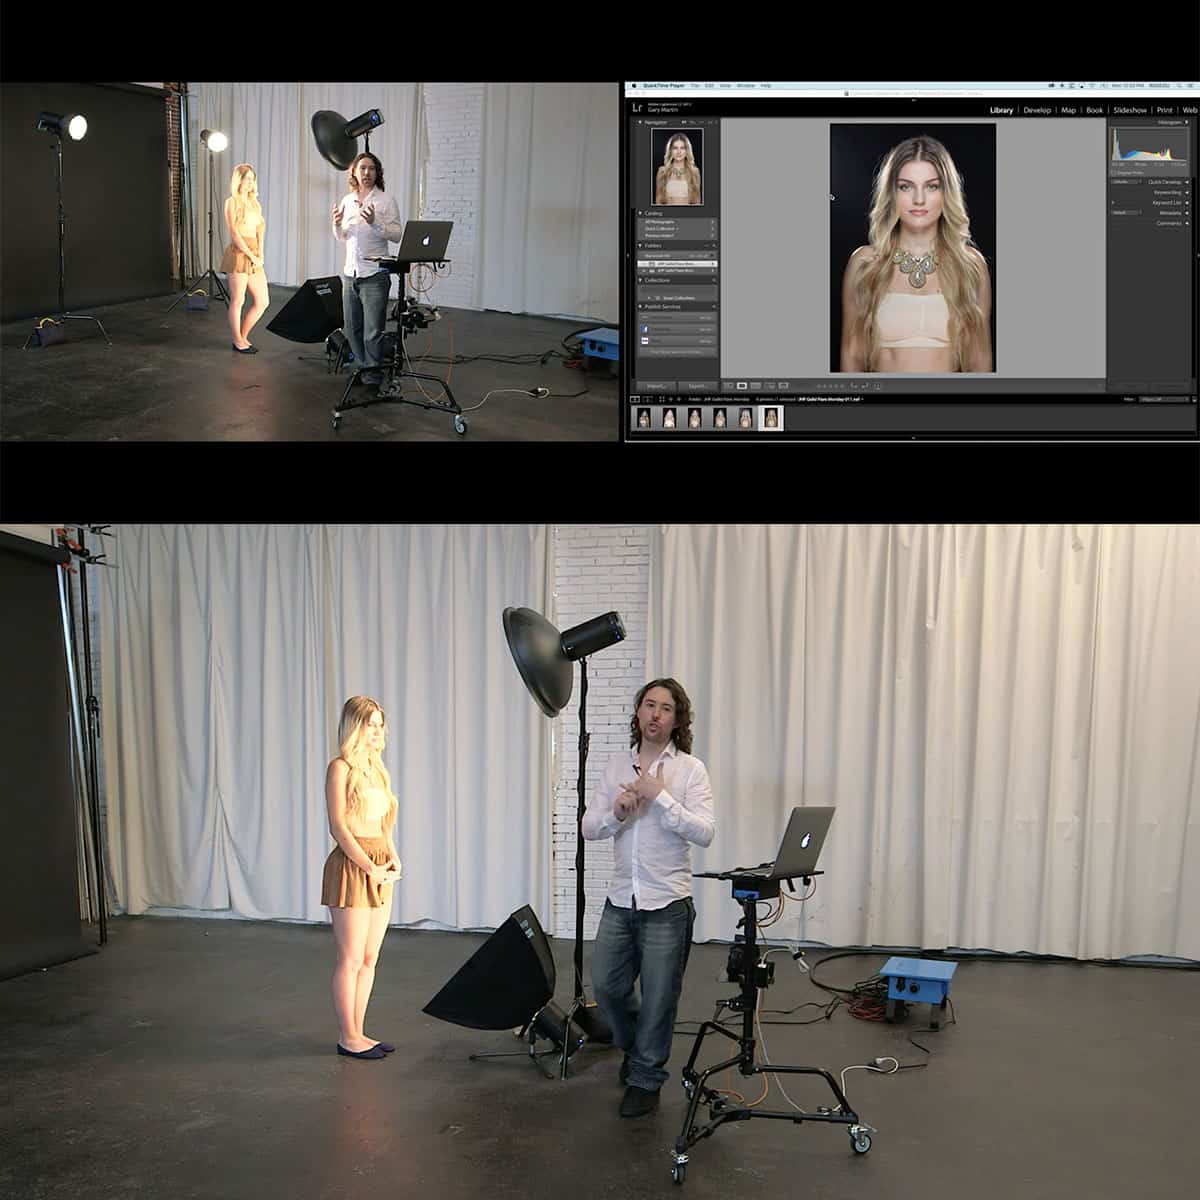
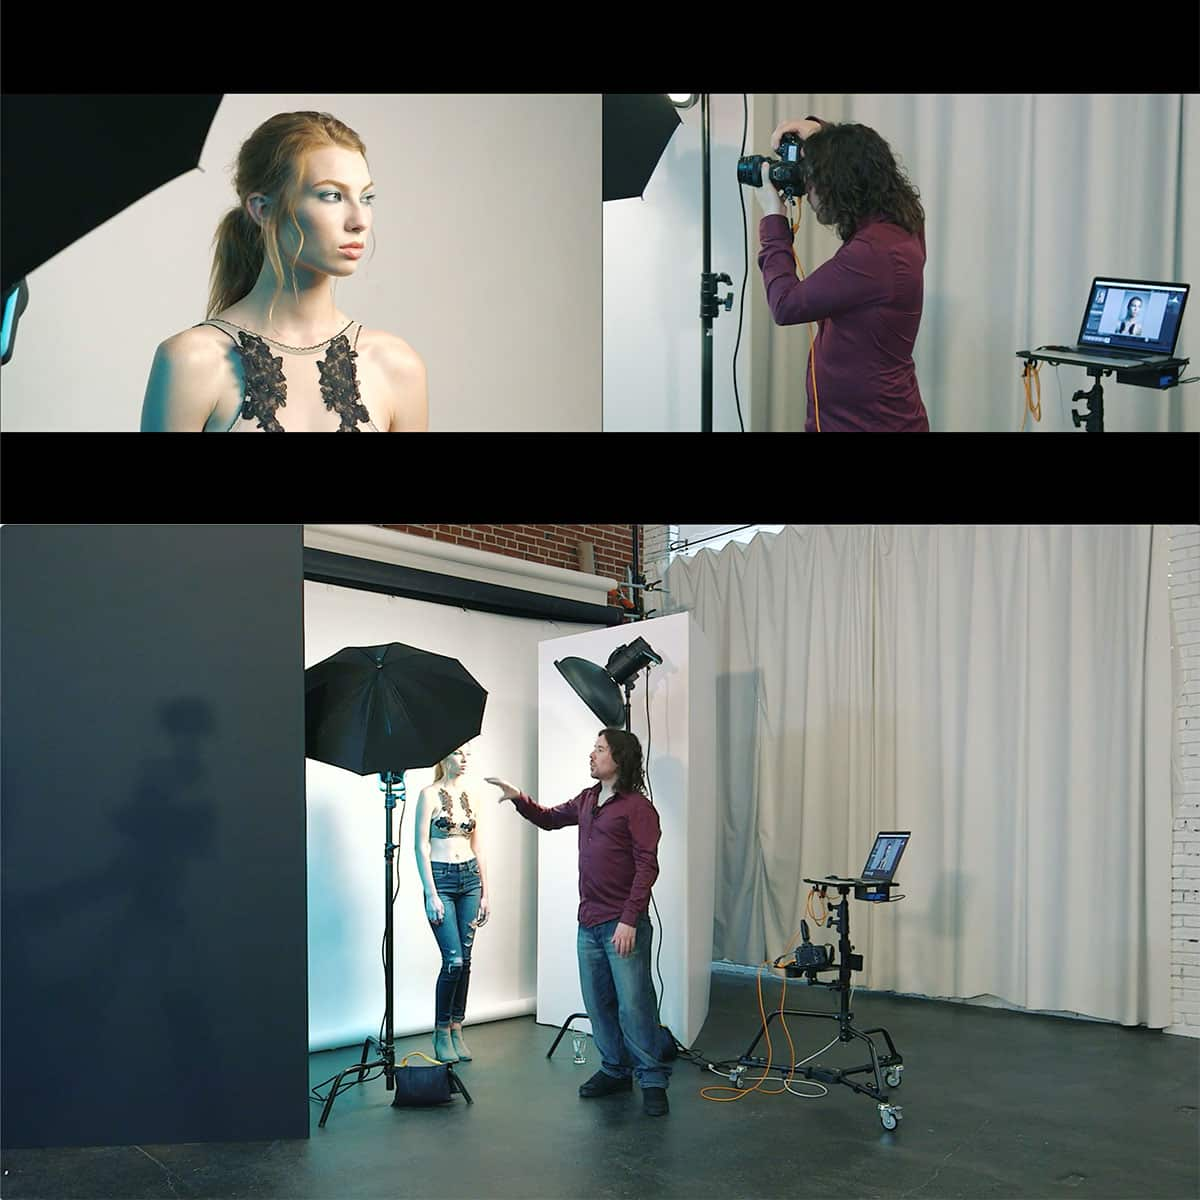
Single Light Setups
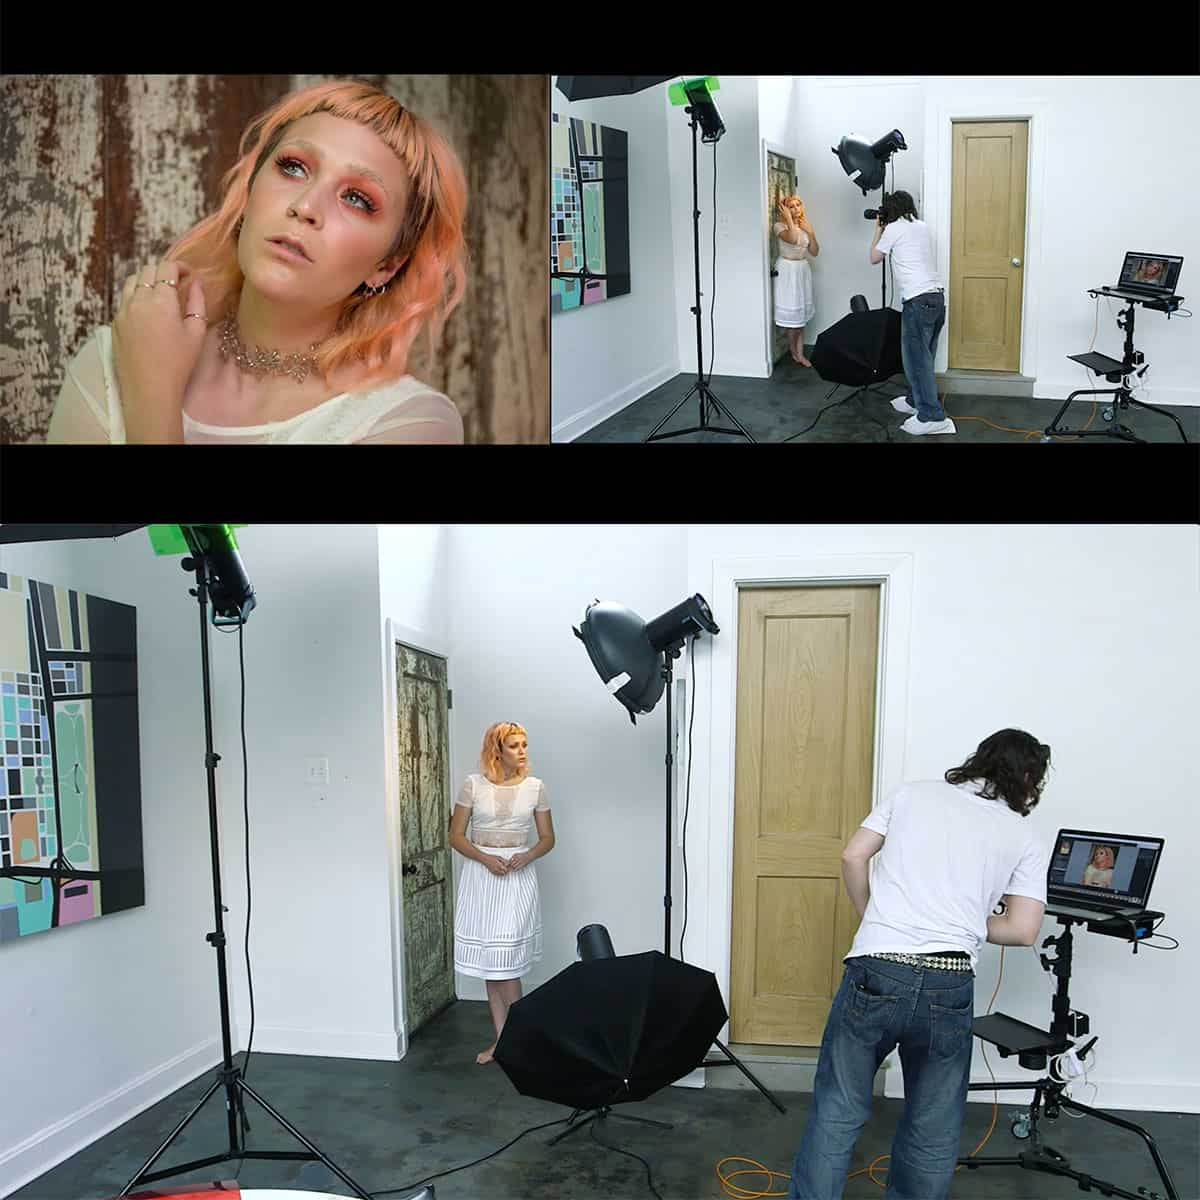
A single light setup is a great way to get started with colored gel photography. It is simple, effective, and requires minimal gear. The key to creating a successful single light setup is to position the light correctly. We recommend using a key light to illuminate the subject and a fill light to reduce shadows.
To create a single light setup, position the key light at a 45-degree angle to the subject. This will create a natural-looking shadow and highlight the contours of the subject's face. Use a colored gel on the key light to add a pop of color to the image.
Multiple Light Configurations
Multiple light configurations offer more control over the lighting and can help you achieve more dramatic results. There are several different configurations that you can use, including three-point lighting, four-point lighting, and more.
Three-point lighting is a popular choice for colored gel photography. It consists of a key light, a fill light, and a hair light. The key light illuminates the subject, the fill light reduces shadows, and the hair light adds depth and dimension to the subject's hair.
Four-point lighting is similar to three-point lighting, but it adds an additional light called an accent light. This light is used to highlight a specific area of the subject, such as their eyes or mouth.
Off-camera lighting is another technique that can be used to create stunning colored gel images. This involves using a flash or strobe that is not attached to the camera. Off-camera lighting allows you to position the light in any direction, giving you more control over the lighting and the ability to create more dramatic images.
In conclusion, lighting is a crucial element in colored gel photography. Whether you are using a single light setup or a complex multiple light configuration, it is important to position the lights correctly and use colored gels to add a pop of color to your images. By experimenting with different lighting gels and setups and techniques, you can create stunning images that are sure to impress.
Creating the Gelled Look in Photography
In gelled portraiture, the gelled look is created by using colored gels on the lights to add color to the subject or the background. There are different ways to create the gelled look in photography, and in this section, we will discuss some of them.
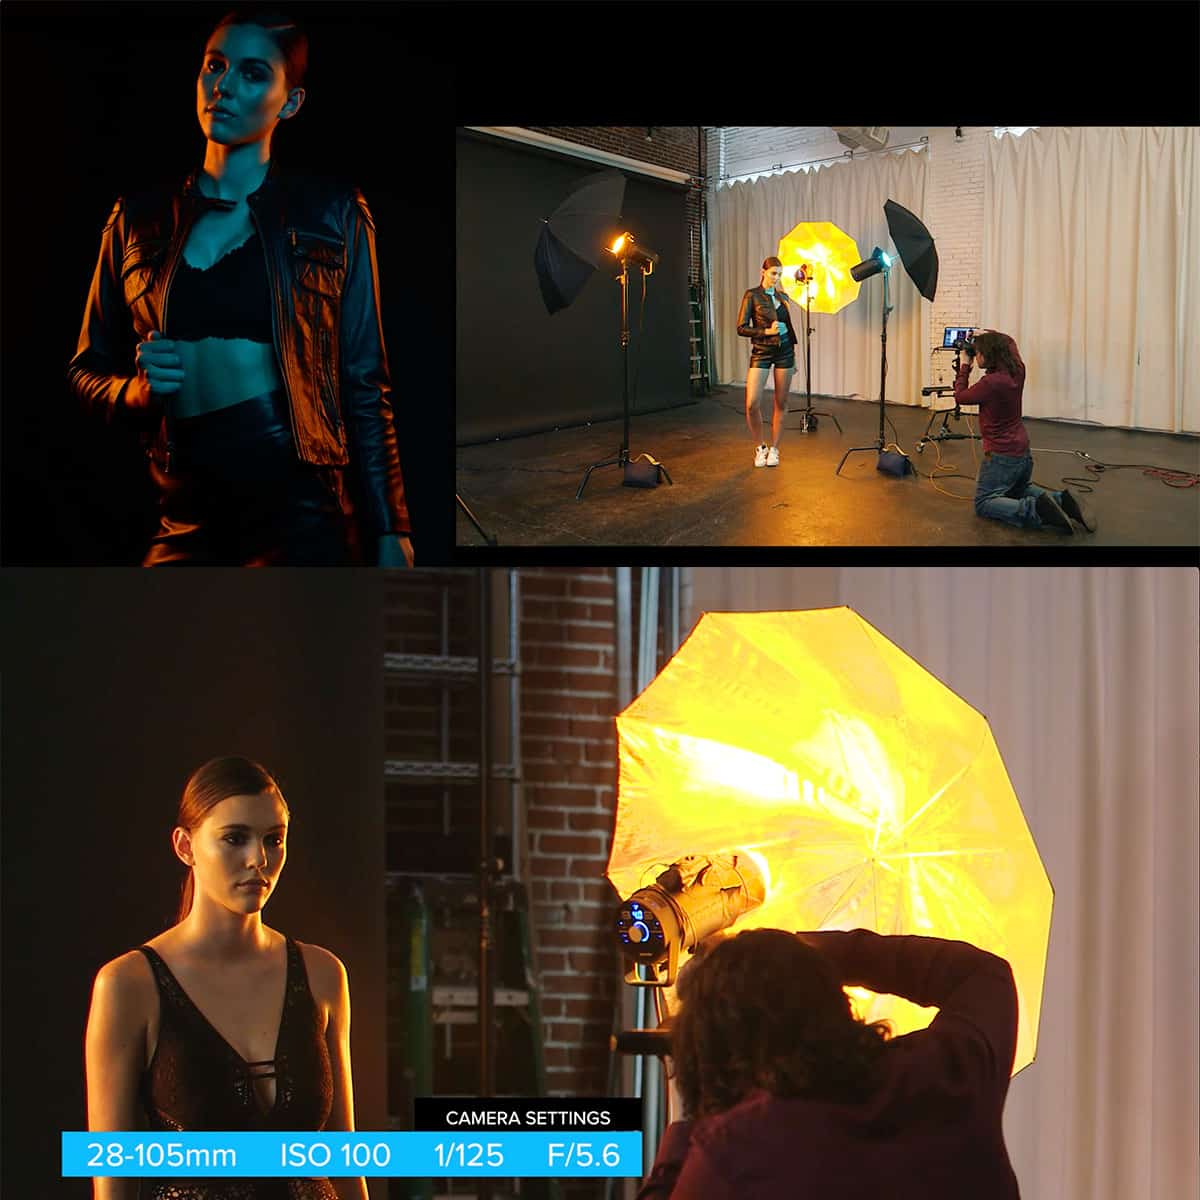
Gelled Flare Look
The gelled flare look is created by placing a colored gel on the lens to add color to the flare often with just a small light source. This technique is commonly used in cinematic studio lighting to create a dramatic effect. To achieve this look, you need to place the colored gel on the lens and shoot towards a light source. The light will reflect off the gel and create a colored flare.
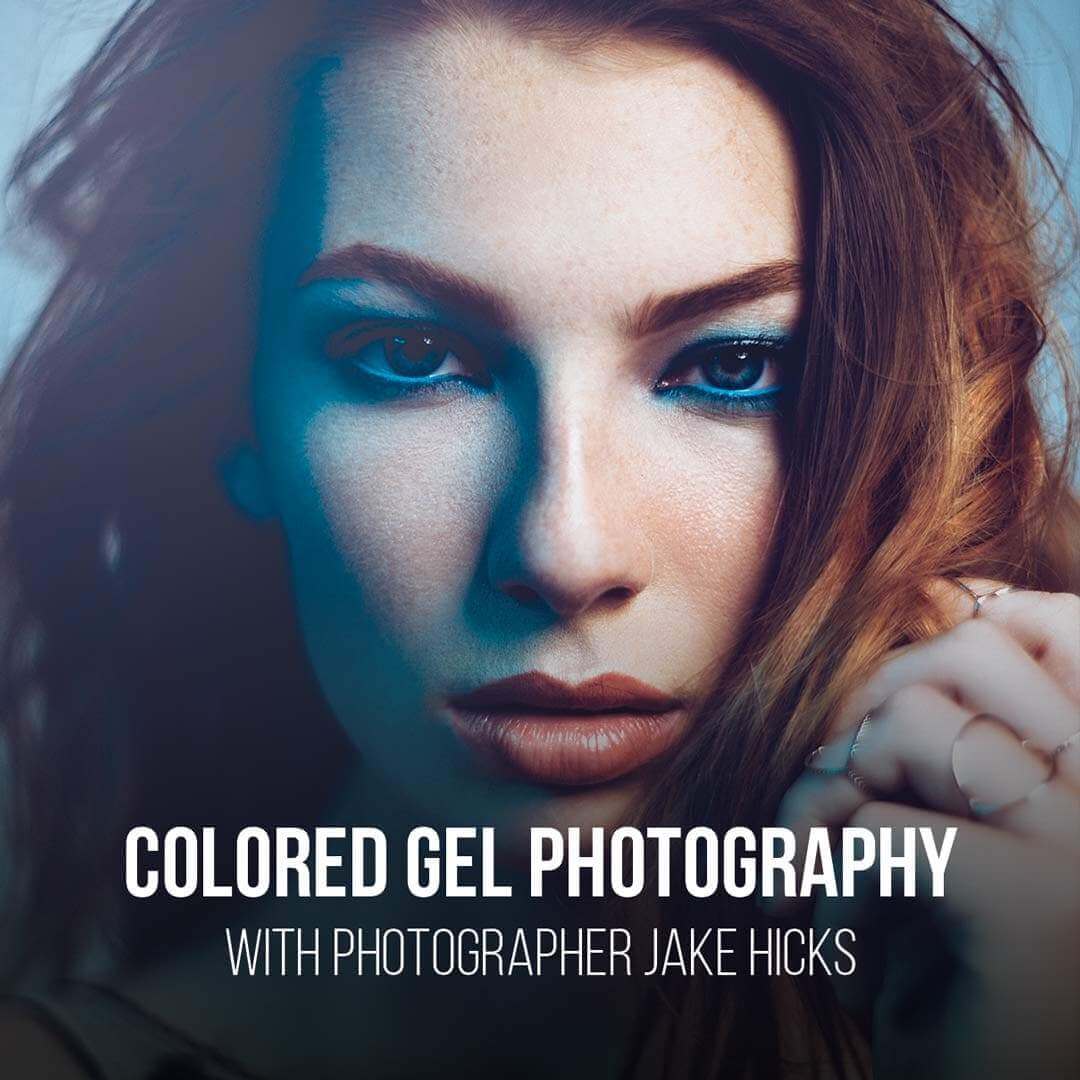
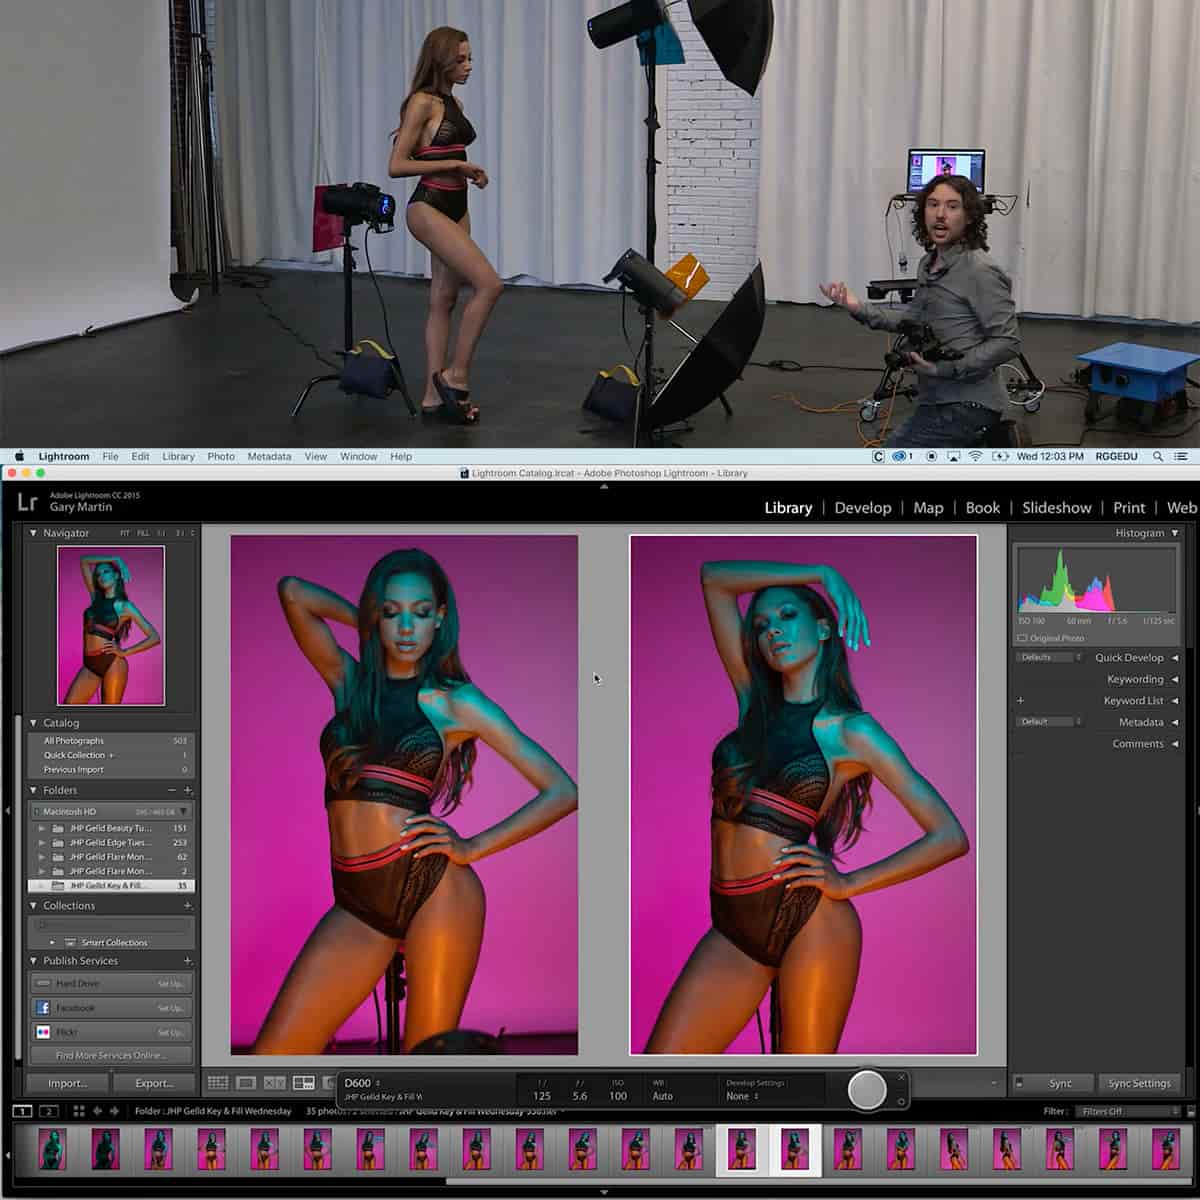
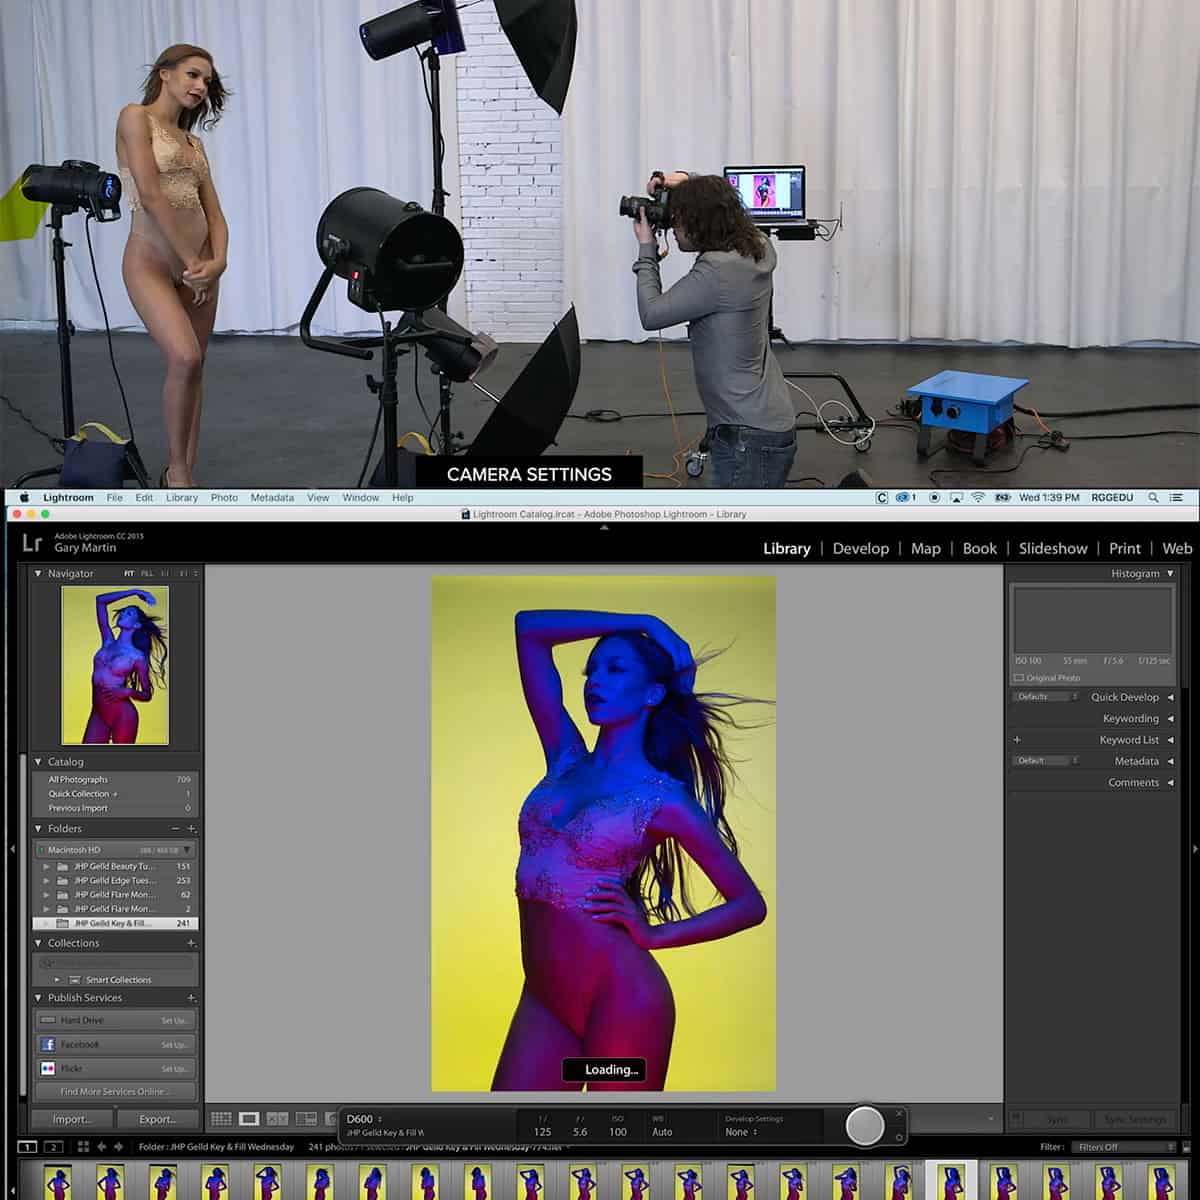
Gelled Beauty Look
The gelled beauty look is created by placing a colored gel on the light source to add color to the subject's skin. This technique is commonly used in gelled lighting to create a unique and creative portrait. To achieve this look, you need to place the colored gel on the light source and position it close to the subject. The light will reflect off the gel and create a colored light on the subject's skin.
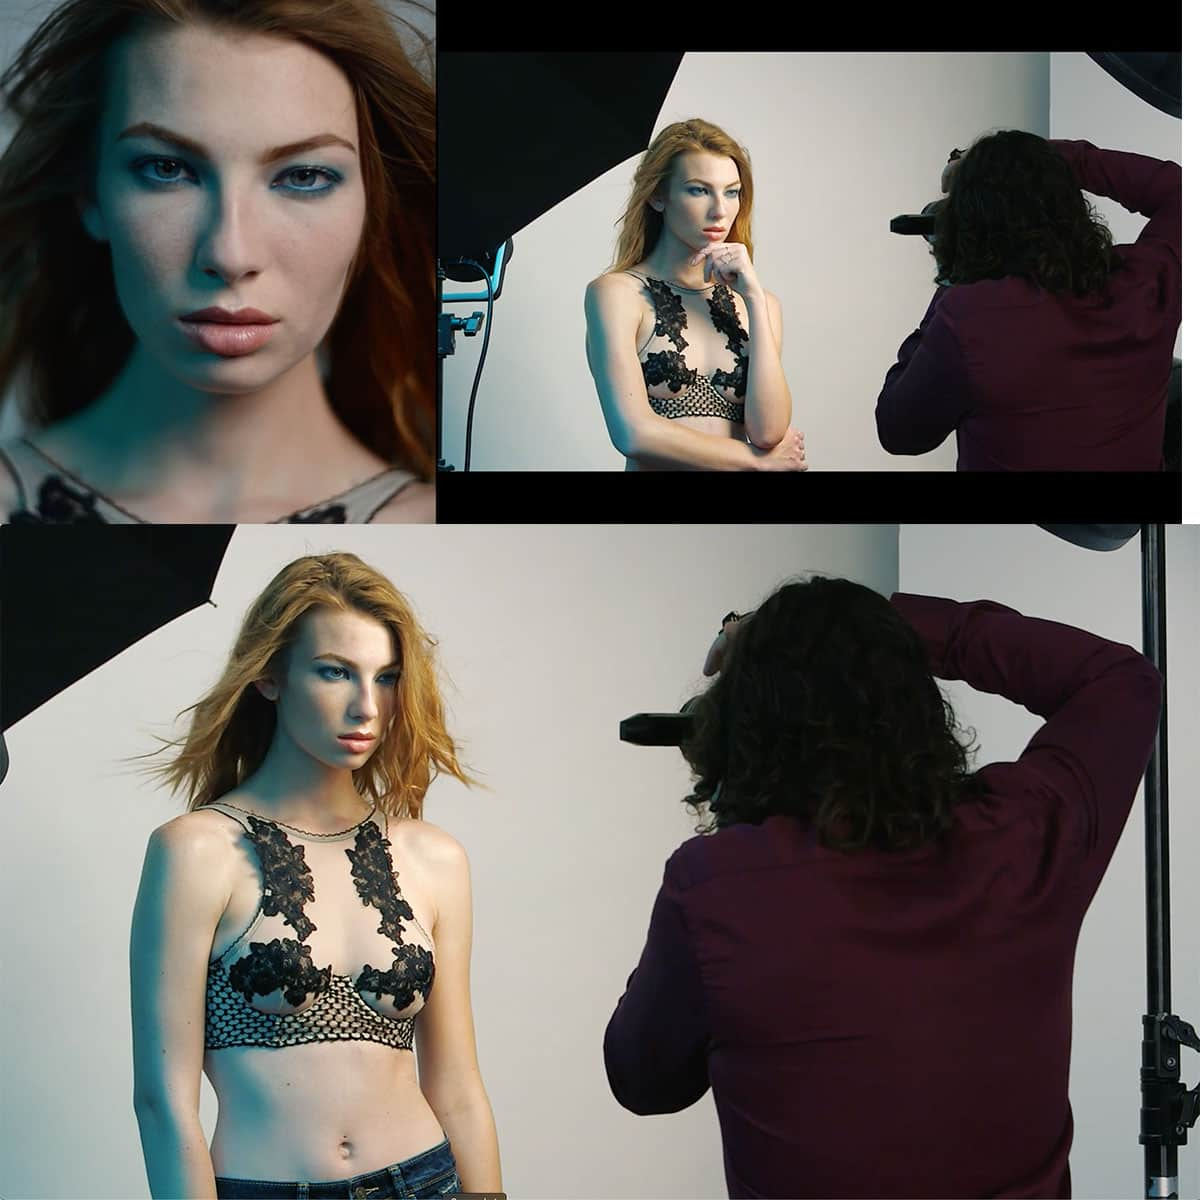
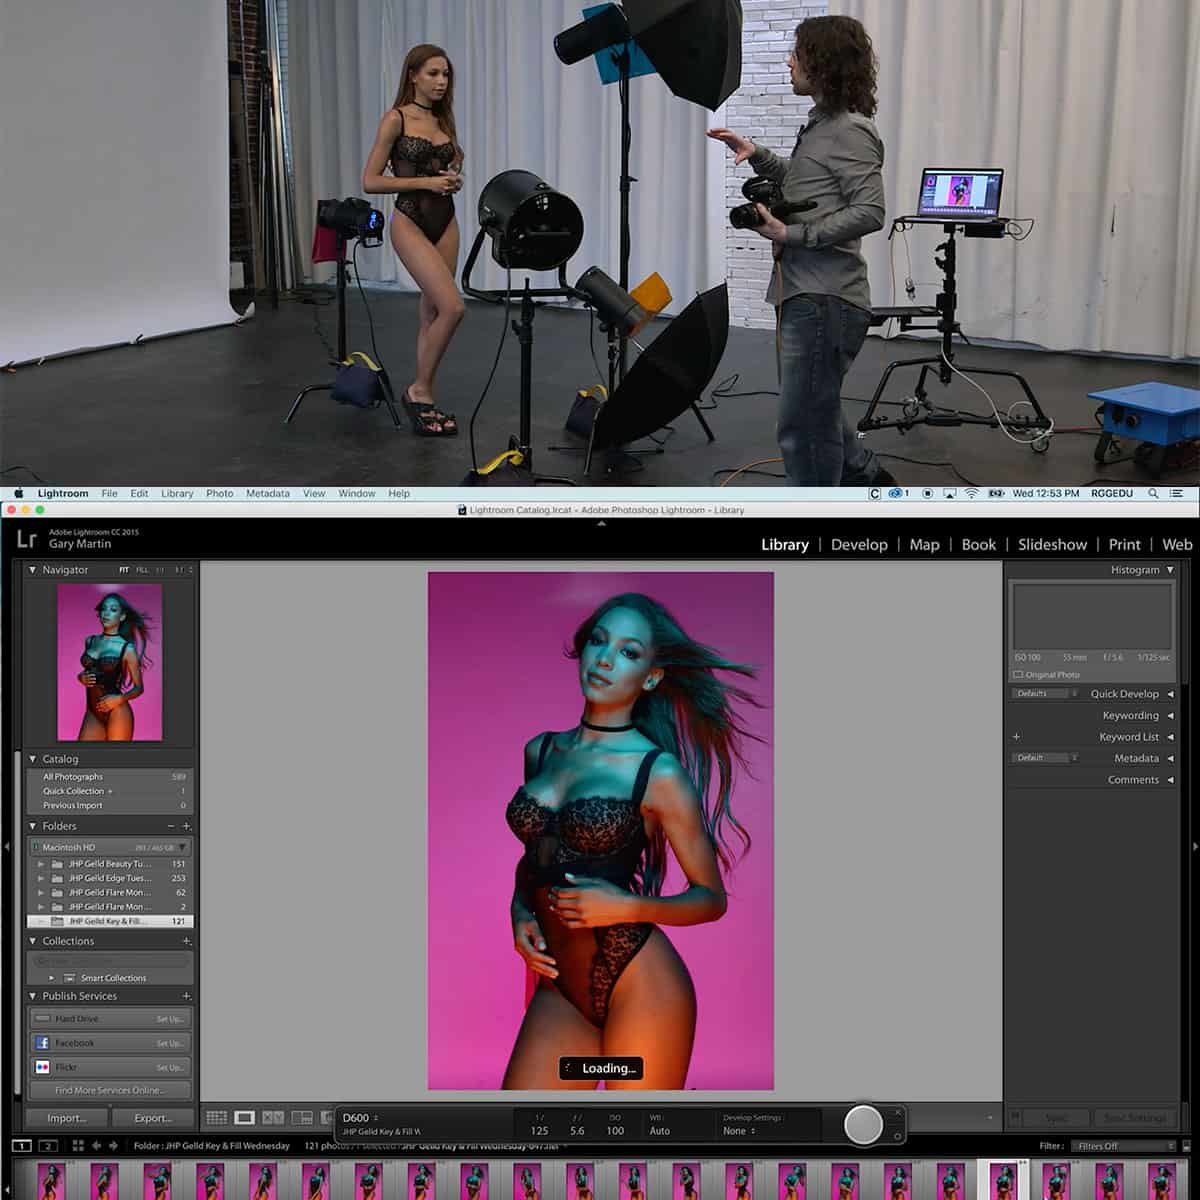
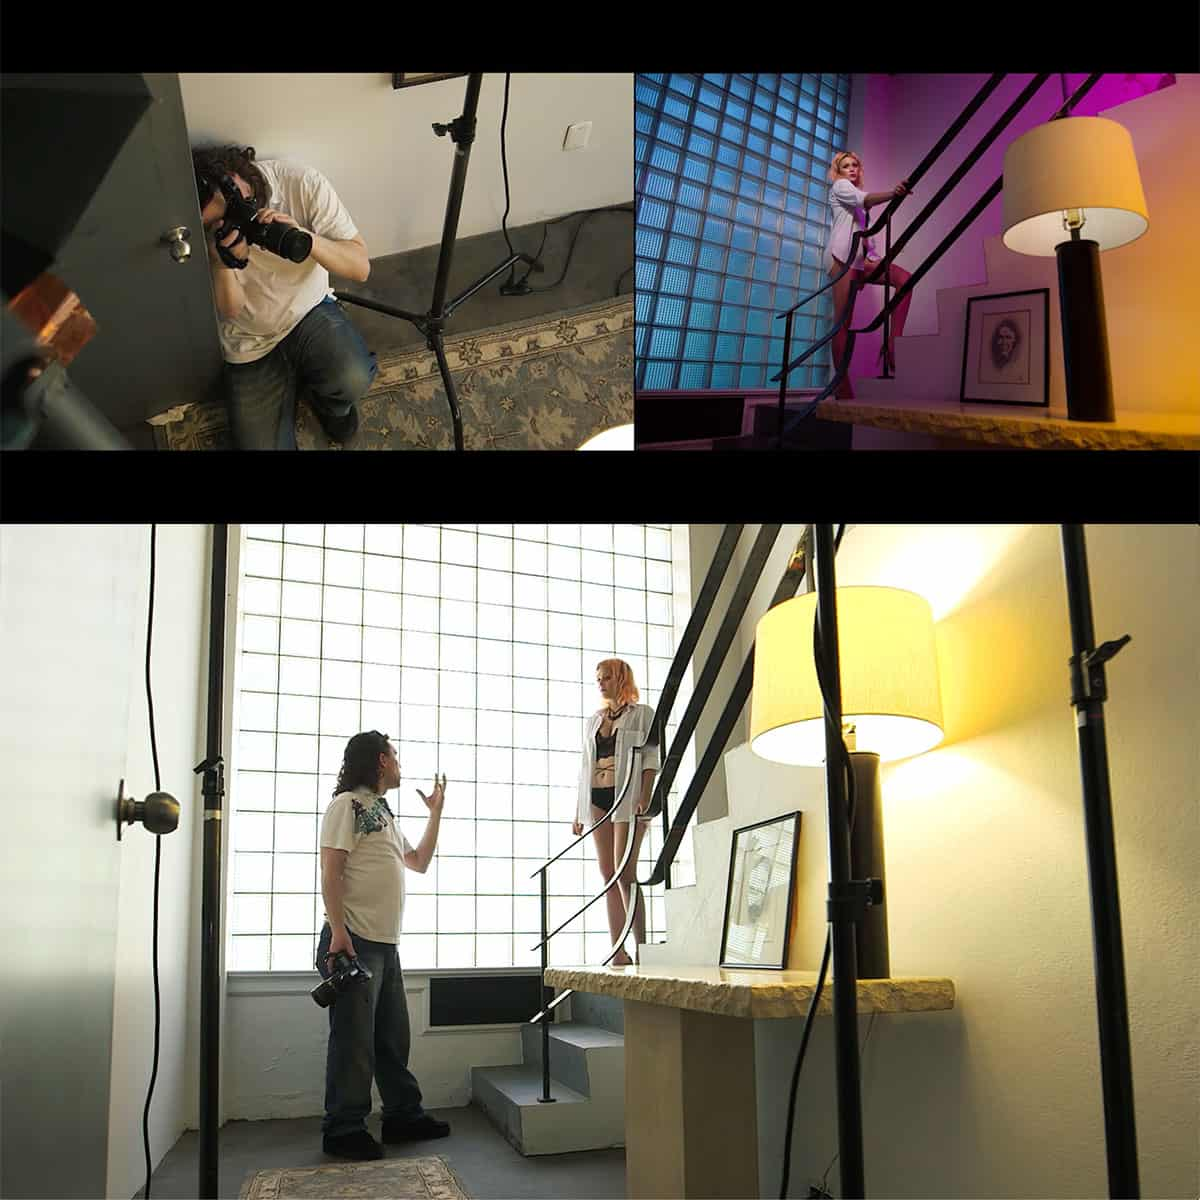
Gelled Edge Look
The gelled edge look is created by placing a colored gel on the rim light to add color to the edge of the subject. This technique is commonly used in gelled lighting to create a separation between the subject and the background. To achieve this look, you need to place the colored gel on the rim light and position it behind the subject. The light will reflect off the gel and create a colored edge around the subject sometimes with a subtle glow.
In conclusion, the gelled look is an effective way to add color and drama to your portraits. There are different ways to create the gelled look in photography, and the techniques discussed in this section are just a few of them.
Related Products:
Post-Production and Retouching
Once we have captured the images, it's time to move to the post-production and retouching phase. In this section, we will discuss the steps involved in color correction and advanced techniques in Photoshop.
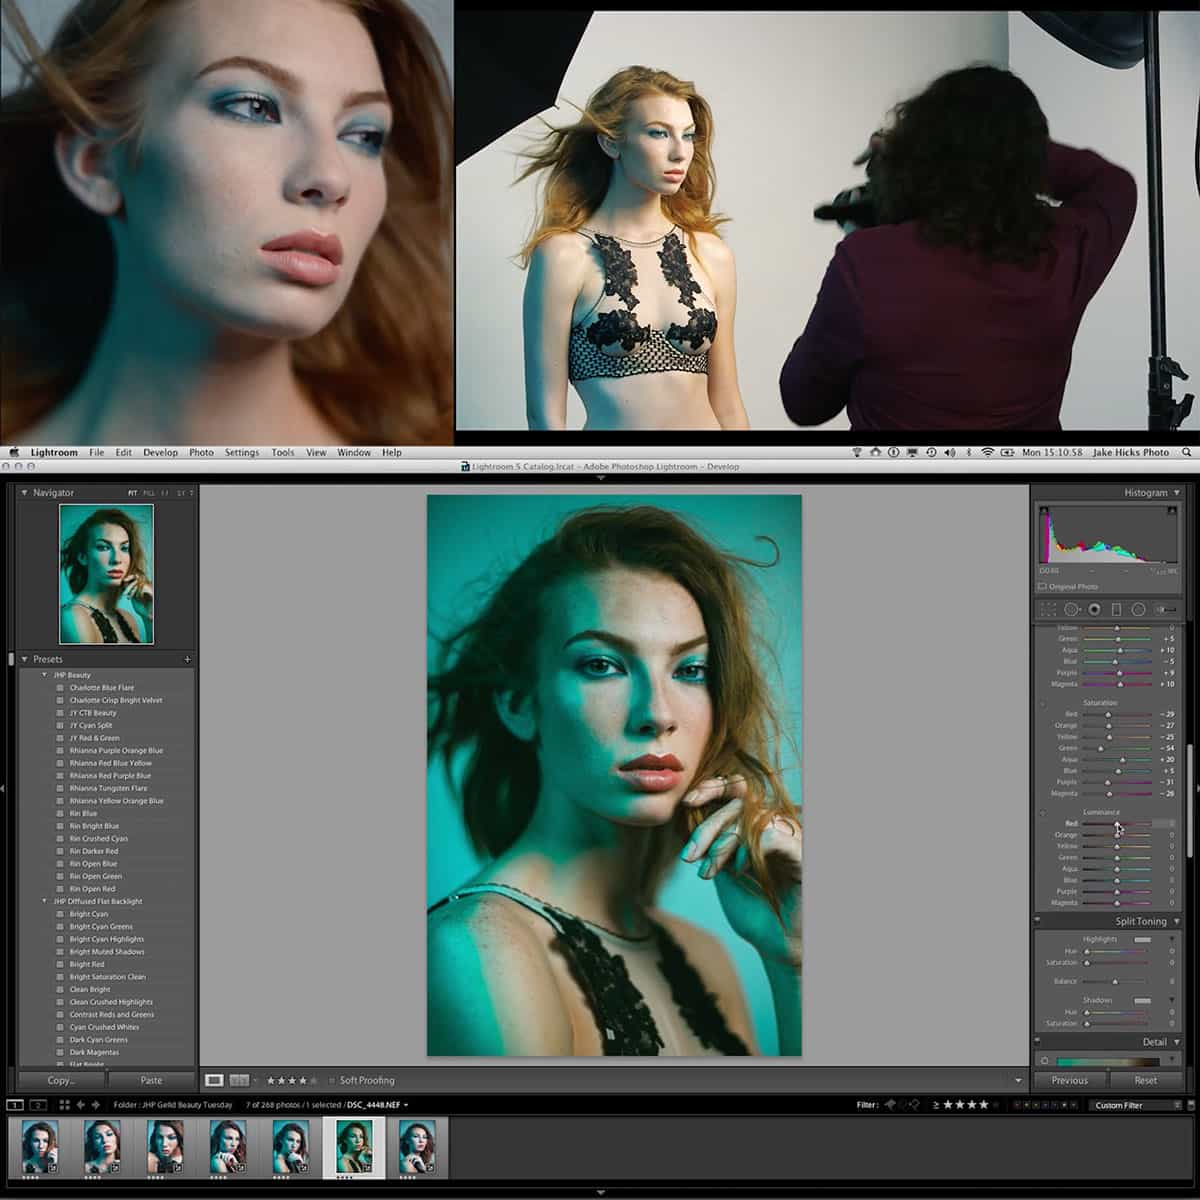
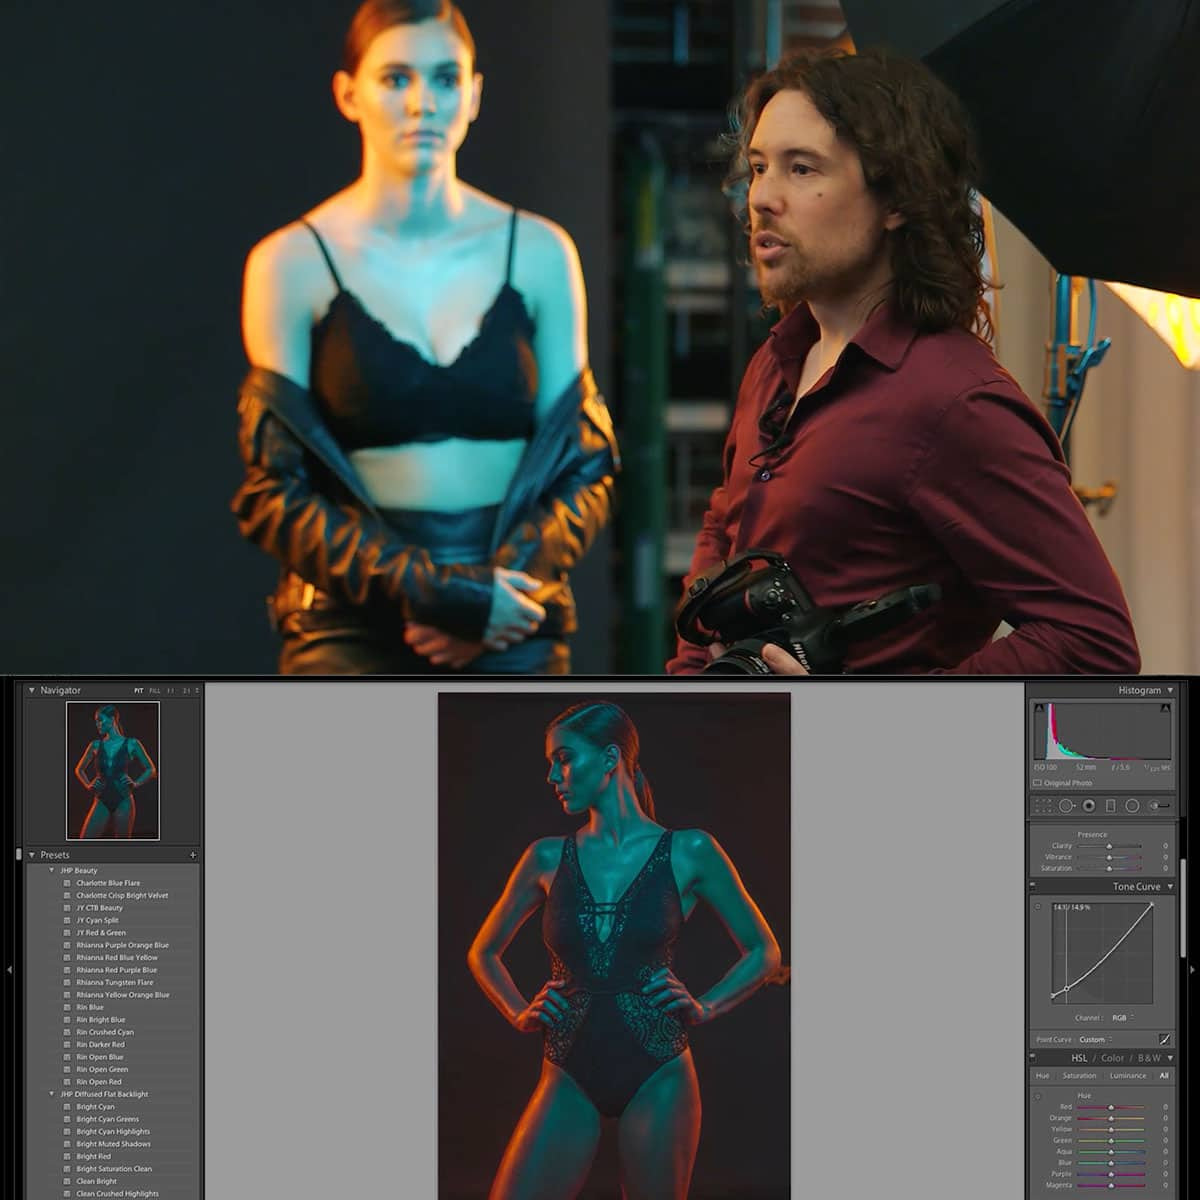
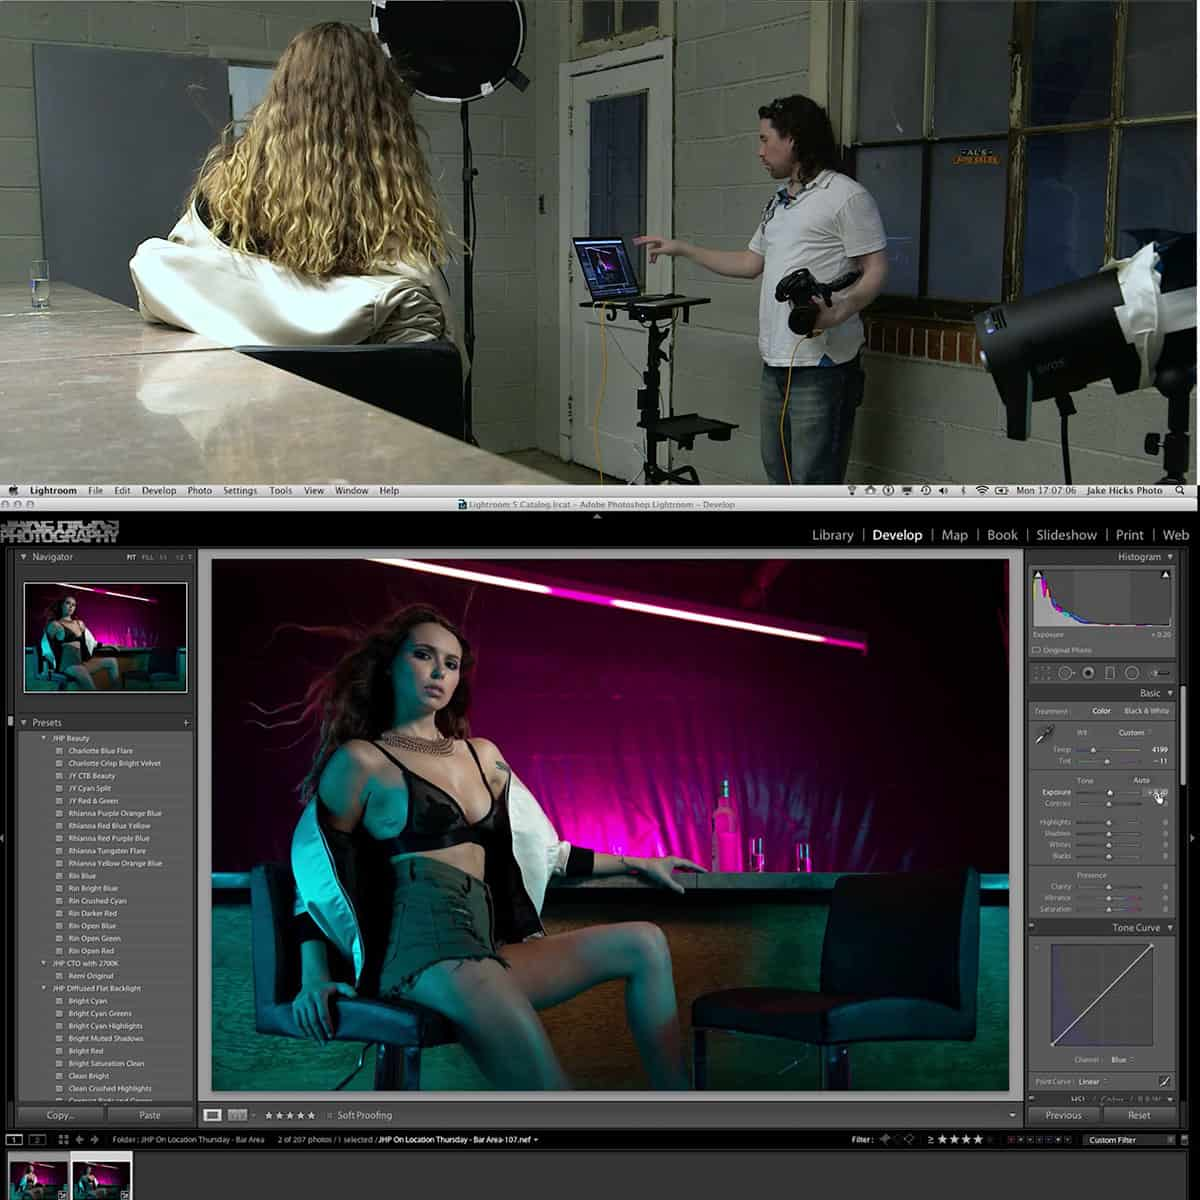
Using Lightroom for Color Correction
Lightroom is a powerful tool for color correction, enhancing double colored images, and image management. It is a great tool for organizing and managing large collections of images. In colored gel photography, we use Lightroom to adjust the color temperature, exposure, and contrast of the images. We can also use the HSL panel to adjust the hue, saturation, and luminance of individual colors.
One of the best features of Lightroom is the ability to create presets. Presets are saved settings that can be applied to images with a single click. We can create presets for different lighting conditions and color combinations that give various saturated colors. This will save us a lot of time in post-production.
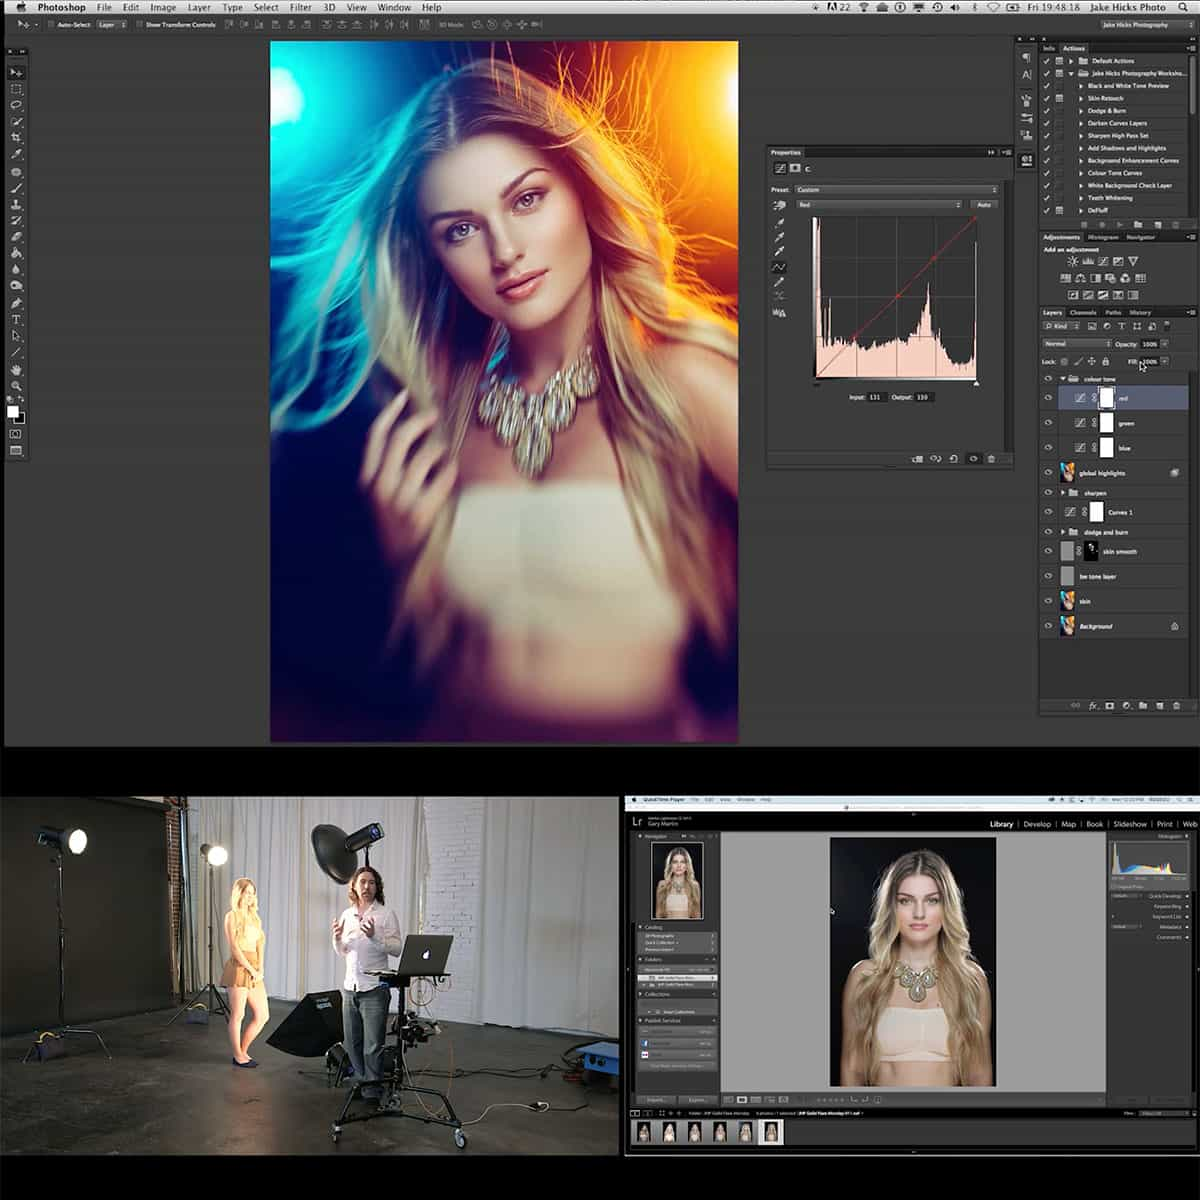
Advanced Techniques in Photoshop
Photoshop is the industry standard for image editing and retouching. In colored gel photography, we use Photoshop to remove blemishes, enhance details, and add special effects. We can also use Photoshop to create composite images by combining multiple images into a single image.
One of the most useful tools in Photoshop is the Clone Stamp tool. This tool allows us to remove unwanted objects or blemishes from an image. We can also use the Healing Brush tool to remove imperfections while preserving the texture of the skin.
Another useful tool in Photoshop is the Liquify filter. This filter allows us to reshape or distort an image. We can use this tool to enhance the curves of a model or create interesting effects.
Related Posts:
Building a Portfolio with Gelled Photography
As we continue to explore the basics of colored gel photography with Jake Hicks, it's important to consider how to build a portfolio that showcases your best work. A strong portfolio is essential for any photographer looking to work in fashion or portraiture, and gelled photography can be a great way to add a unique and creative element to your portfolio.
Shooting for Fashion and Portraiture
When shooting for fashion or portraiture, it's important to consider the overall aesthetic you want to achieve. Colored gels can be used to create a variety of moods and atmospheres, from bold and vibrant to soft and romantic. By experimenting with different colors and lighting setups, you can create a portfolio that showcases your versatility as a photographer.
One great way to incorporate gelled photography into your fashion or portraiture portfolio is to create a series of themed shoots. For example, you could create a series of images that all feature a particular color or set of colors, some that just use side light, or ones that all have a specific mood or theme. This can help to tie your portfolio together and create a cohesive body of work.
Curating Your Best Work
Once you've created a portfolio of gelled photography, it's important to curate your best work. This means selecting only the strongest images to showcase in your portfolio, and arranging them in a way that tells a story and highlights your unique style and vision.
When selecting images for your portfolio, be sure to choose a variety of shots that showcase your range as a photographer. This might include close-up portraits, full-body shots, and images that showcase your use of color and lighting. You may also want to include some behind-the-scenes shots or process shots to give viewers a glimpse into your creative process.
Overall, building a portfolio with gelled photography can be a great way to showcase your creativity and stand out as a photographer in the competitive worlds of fashion and portraiture. By experimenting with different colors and lighting setups, and curating your best work, you can create a portfolio that highlights your unique vision and style.
Expanding Your Skills with Advanced Tutorials
Once you have a good grasp of the basics of colored gel photography, it's time to take your skills to the next level. Fortunately, Jake Hicks has created an extensive tutorial series that covers everything you need to know to become an expert in this field.
The tutorial series is available here ate Pro Eduand streaming on the Learn site. It includes over 22 hours of HD video content, broken down into 85 videos that cover a wide range of topics.
One of the standout features of this tutorial series is the inclusion of English closed caption subtitles. This makes it easy for non-native English speakers to follow along and understand the material.
In addition to the extensive video content, the tutorial series also includes a range of downloadable resources, including lighting diagrams and Photoshop actions. These resources can help you apply the techniques you learn in the videos to your own photography projects.
Overall, if you're serious about expanding your skills in colored gel photography, we highly recommend checking out Jake Hicks' tutorial series. With its comprehensive coverage of advanced techniques and its wealth of resources, it's an excellent investment in your photography education with an extensive table of contents.
Frequently Asked Questions
What is the purpose of using color gels in photography?
Color gels are used in photography to add color to the light source, which can help create a specific mood or atmosphere in the image. The colored light can also highlight certain elements in the photo, such as the subject's hair or clothing.
How do you set up lighting for colored gel photography?
Setting up lighting for colored gel photography requires careful planning and attention to detail. First, decide on the mood or atmosphere you want to create and select the appropriate color gels. Then, position the lights to achieve the desired effect, taking into account the direction, intensity, and color of the light. It is also important to consider the placement of the subject and any props or background elements.
Can you explain the color theory behind selecting gels for photography?
Color theory plays a significant role in selecting gels for photography with colored lighting. Different colors can evoke different emotions and moods, so it is important to choose colors that complement the subject and the overall theme of the photo. For example, warm colors like red, orange, and yellow can create a sense of energy and excitement, while cool colors like blue and green can create a calm and serene atmosphere, even if they are simply background lights.
What are the essential techniques for mastering colored gel photography?
Mastering colored gel photography requires a combination of technical skill and creativity. Essential techniques include understanding the basics of lighting, color theory, and composition, as well as experimenting with different color combinations and lighting setups and even colored rim light as Jake uses quite often. It is also important to have a clear vision of the final image and to communicate effectively with the subject and any assistants.
How do color correction gels differ from creative color gels?
Color correction gels are used to correct or balance the color temperature of the light source, while creative color gels are used to add a specific color or color effects to the light. Color correction gels are typically used in situations where the existing light source has a different color temperature than the desired outcome, while creative color gels are used to enhance the mood or atmosphere of the photo.
What are some common mistakes to avoid when starting with colored gel photography?
Some common mistakes to avoid when starting with colored gel photography include using too many colors or using colors that clash with the subject or the overall theme of the photo. It is also important to avoid overexposing or underexposing the subject, as this can affect the overall color balance of the image. Finally, it is important to experiment and practice with different lighting setups and color combinations to find what works best for your style and vision.


